Sunday, May 22, 2011

Body Refinishing Hell

With the body prep process well under way, I have already logged many hours sanding, scraping, prying, and cleaning various areas of the body.

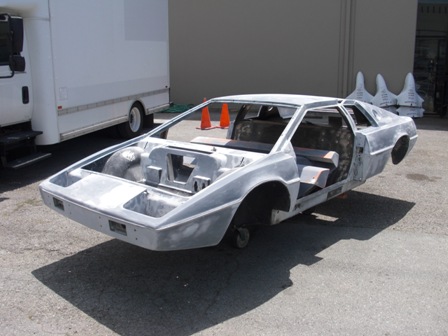
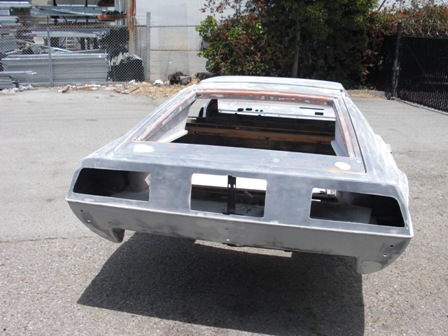
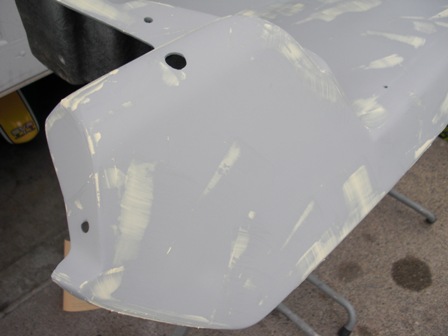
Overall this has been the most difficult, discouraging part of the restoration process. The body had many more stress cracks than I initially thought – most of them in really tough areas like the front and rear hatch drainage channels and the door sills. Essentially every area where something could be “slammed” closed (doors, rear hatch, front hood) had spider webbing everywhere and needed fiberglass repairs. Due to the contours of these areas, re-glassing and re-shaping took a long time. To fix the issue permanently, I added new layers of glass behind the visible surfaces to make them stronger.

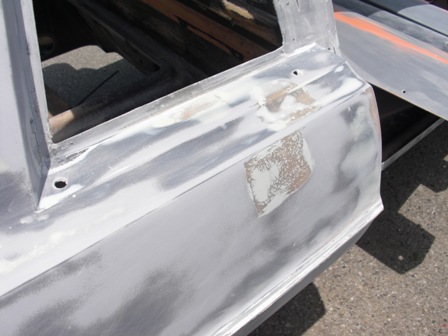
Another issue is that the soda blasting was harsh enough to expose a lot of the underlying defects in the gelcoat. This revealed hundreds of small pinholes or imperfections that needed to be re-filled. Lesson learned that it was probably a bad idea to have the body media blasted.

Focusing on the underside of the car and the wheel wells, it had a fine layer of undercoat which I’m halfway through removing (I’d like to have the underside refinished), and the chassis tunnel had thick foam bonded to it, which I’ve have the pleasure of scraping off, usually straight into my face and eyes as I work upside down!

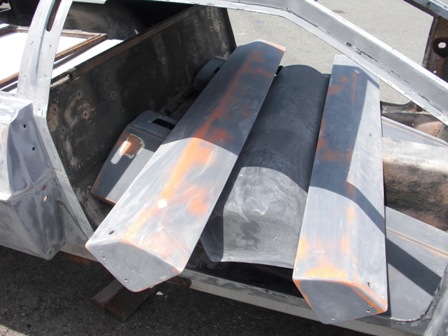
I opted to remove the rocker panels to make sure the underlying seat belt mounts weren’t rusted away (bad if I ever had an accident), but my panels were bonded which meant that I had to pry them away from the body. It wasn’t an easy job and I actually did more damage than good (my seatbelt mounts were perfect, no rust!!), so I ended up cracking the fiberglass in several areas of the rocker panels for no good reason. Both panels needed to be re-glassed in a few areas but that didn’t cost me too much time.

At this point of the update, my doors are fully prepped along with the rear hatch, front hood, rear valance, rocker panels, and headlight pods. I still have a lot of work to do on the main body but most of the hard repairs are done. Now it’s just a matter of doing more block sanding and filling pinholes. I’m getting there, but I can’t wait until this stage is done – I’m over it!


Friday, May 13, 2011

Rebuilding the Lotus Esprit S1 Radiator Assembly

The S1 Lotus Esprit has a prominent radiator shroud (a huge piece of molded fiberglass which bolts underneath the front of the car and holds the radiator in place). Since the outer face is visible from underneath the car, it was important to get everything back to factory spec. Mine was in bad shape and broken in several places. Since the radiator was not properly secured (all of the fixing bolts had worked themselves free over time), the heavy radiator was jumping around inside the shroud which broke the fiberglass in several areas. I re-glassed the bits together and then added a few more layers to ensure the new assembly was stout. The process took a long time, mostly because the fiberglass cloth had to be cut in the right pattern in order to create a uniform pattern on the backside of the shroud assembly.

From there, I sent out my radiator to get rebuilt and then welded a new metal radiator surround thanks to a kit supplied by SJ Sportscars. The old radiator fans (antiquated by today’s standards) were replaced with more reliable 7 x 2 inch fans. I needed to fabricate mounts for the fans to bolt directly to the radiator, but it was pretty easy to figure out.

As the last step, I refinished the exterior of the fiberglass shroud assembly, fixing some curb rash and rock damage on the lower edges, as well as smoothing out the seams and pinholes that were left over by a shoddy build process at the Lotus factory. After fitting a new metal grille, mounting hardware and a strip of sealing foam, I bolted the radiator back in place. Now it's ready to mount back to the car.


Working on the fiberglass radiator shroud after having
re-glassed the entire structure.


The shroud after the color was applied.


One of the aftermarket radiator fans.


The radiator fans attached to the radiator assembly.


A side view of the radiator shroud, which was re-inforced
with three full layers of new fiberglass.


A new radiator shroud grille, which I had powder coated
in wrinkle black.


Job done!