Thursday, December 29, 2011

Attaching the European Rear Valance and Bumper

The S1 Lotus Esprit had two styles of rear bumper/rear valance depending on which region of the world the car was delivered. The USA cars had a less desirable style thanks to the Federal bumper regulations back in the day. The bumpers were enormous – so big that it makes the car look out of proportion. The EURO style is by far a better looking option in my opinion so I opted to replace all the old pieces with new bodywork sourced from England.

This introduced several problems though as the EURO bumpers and valance were not designed to bolt directly up to the USA spec body. The solution was to re-work the rear bumper mounting points, fabricate additional support mounts for the rear valance and buy a EURO spec silencer mounting channel (yes, there was a different style for US cars!!) as it makes the exhaust sit higher and clear the opening for the exhaust pipes. At the end of the day, it was really expensive and time consuming to change a USA car over to EURO spec. Hopefully the end result will be worth it!

Applying the Waistline Trim

The Lotus Esprit has a seam at its centerline where the two fiberglass halves were bonded and glassed together at the factory. A set of plastic trim covers the seam and surrounds the entire car. Having removed mine when I started the bodywork, it was time to re-apply the new trim sections. The material was easy enough to apply using a heat gun and the right compound of glue. In all it’s a full-day job to cut, align, and bond the trim. You can’t get it wrong because if you need to pull the waist trim off the car once the glue dries, it usually takes the paint with it.


Restoring the Lotus Esprit Engine Bay Cover

Although I’ve never been a big fan of the early Esprit engine cover (it looks a lot like Lotus ripped it off an old vintage boat!), it’s another piece that had to be restored. I sanded down the exterior, fixed some stress cracks, and painted it using standard Detroit automotive primer (the stuff they primer modern US cars with). It’s a semi-gloss black – the same color I used to spray both the front and rear bumpers.

The back of the engine cover was cleaned and then I re-applied a layer of heat shielding material to replace the old. The new mounting fixtures were powder coated and re-applied. The edge seal was replaced with a 1991 BMW E30 trunklid seal. It had almost the same dimensions and fit perfectly, and a lot cheaper than sourcing it from England.


Finishing the Underside of Engine & Exhaust Area, Wheel Wells

After the body was painted, there was still a lot of work in finishing the wheel wells and the top side of the exhaust channel. I replaced all the old heat shield material with new and finished the wheel wells with a hardened textured liner. The backside of the rear valance was also completed with heat shield material, as well as extra mounting hardware to keep it fixed to the body.


Saturday, September 10, 2011

Paintwork is Done – Lotus Esprit S1 in Monaco White

After several months and hundreds of hours, it was a great feeling to see the car painted, clear coated, and polished. Every visible inch of the car was wet sanded and polished, leaving no orange peel and an excellent finish. The wheel wells were re-undercoated as well as the front boot area with a heavy material resistant to vibration.

My goal was to get the body in better condition than my S1 Esprit left the factory in 1977, and because I spent dozens of hours reinforcing areas that were previously prone to stress cracks and spider webbing, my hope is that it stays that way for a long time.


A pretty cool shot of the body shell and chassis. With the help of three guys
it was back onto the chassis.


The front hood required a lot of work to ensure a completely flat surface.


A finished set of S1 Lotus Esprit headlight pods.


The original rear valances were too thin and prone to being ripped apart
by the exhaust system behind it. My new rear valance was reinforced with
several layers of fiberglass to make it stronger.


Even my fuel caps needed repairs. There were hours in these alone.


A nice shot of the S1 rear hatch, which is pretty light without the glass!


One of the empty door shells. A lot of work ahead to get these back onto
the car with all the door internals.


One of the rocker panels and door trim pieces, ready to rivet back onto
the body.

Fabricating the Lotus Esprit S1 Engine Carpet Boards

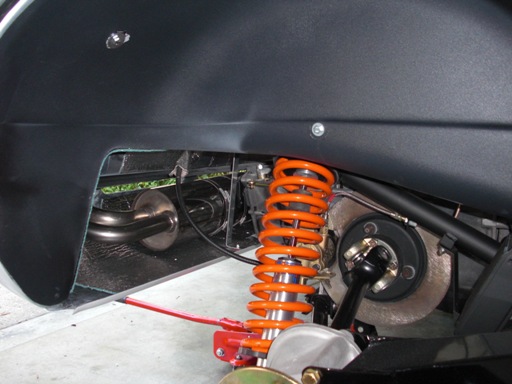
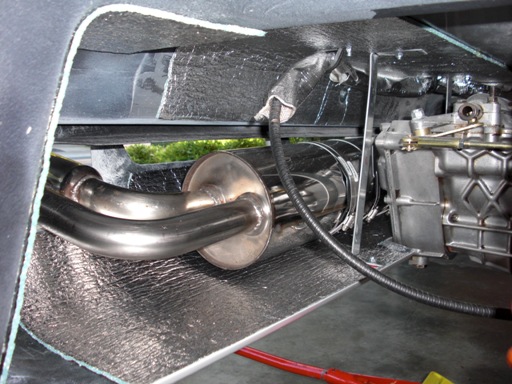
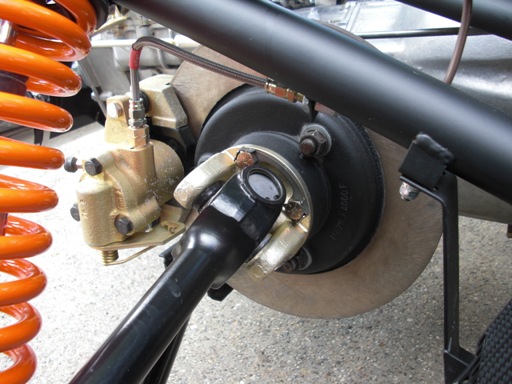
The S1 Esprit came from the factory with a set of plywood carpet boards to cover various areas of the engine bay. Since you can see the majority of the engine compartment through the rear hatch, the carpet boards keep everything tidy by covering items like the fuel tanks, electrical wiring, fuel pump, and some of the smog equipment.

My carpet boards were in bad shape - completely delaminated after 30+ years of constant heat and moisture cycles. The carpet was past its lifespan too, so I would need to replace everything. If you do the job yourself as opposed to ordering new parts from England, it’s a very time consuming job as there are several steps.

Fortunately for me, the wood was in good enough shape to take patterns from and that saved me a lot of time. I traced the pattern onto new boards, then cut them out with a jigsaw. Some of the boards had access holes for electrical wiring and fuel hoses, so I made sure to replicate those too. From there, I ordered a roll of black automotive carpet and then traced the patterns from my freshly cut boards, getting them bound around the edges with black leather trim.

The next step was to spray the exterior of the boards with black paint as to blend with the color of the carpet. From there, I glued the carpet to the boards and then re-attached new “L” brackets to fasten the boards back into the car.


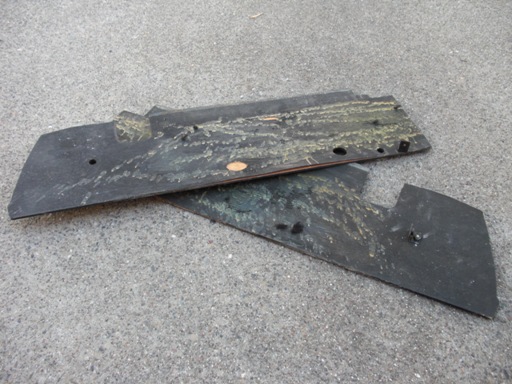
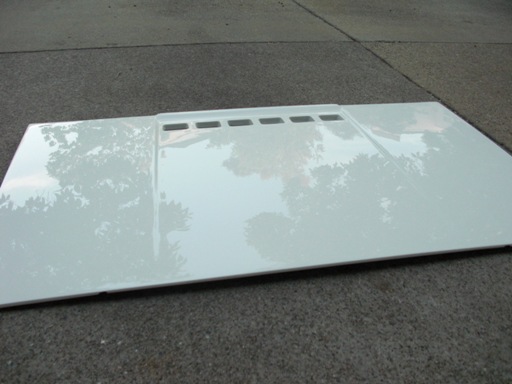
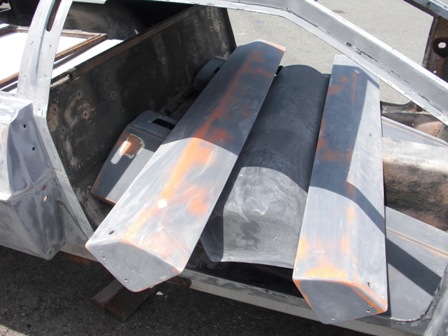
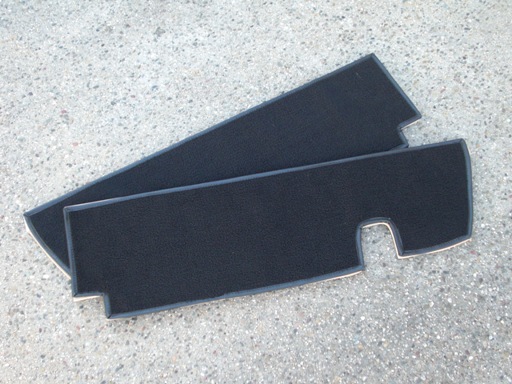
Some of the old carpet boards. The de-lamination was bad and they
were falling apart. Time to replace.


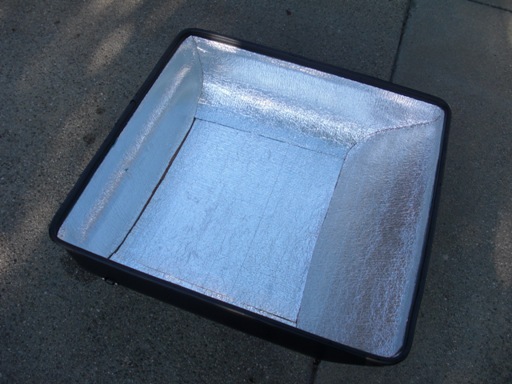
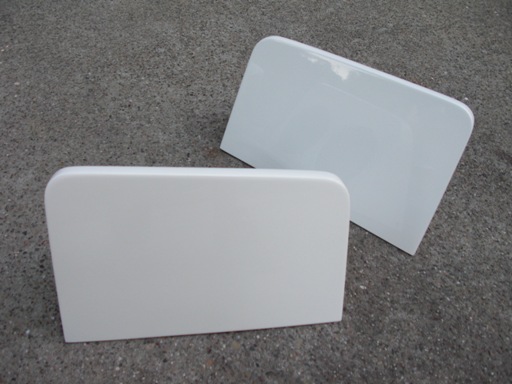
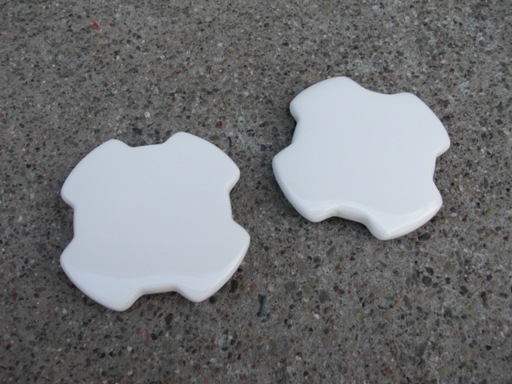
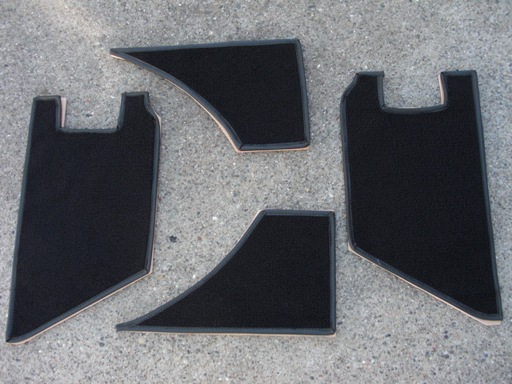
Two of the new carpet boards which cover each side fuel tank.


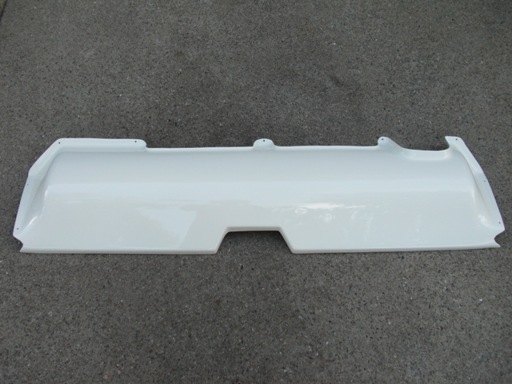
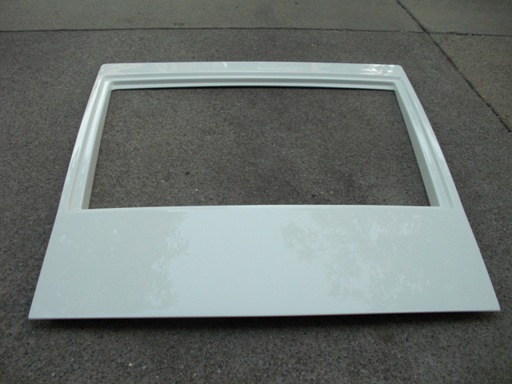
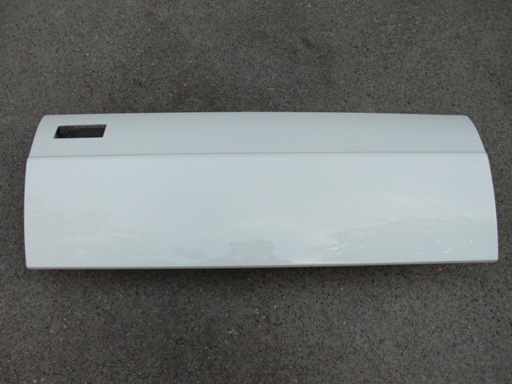
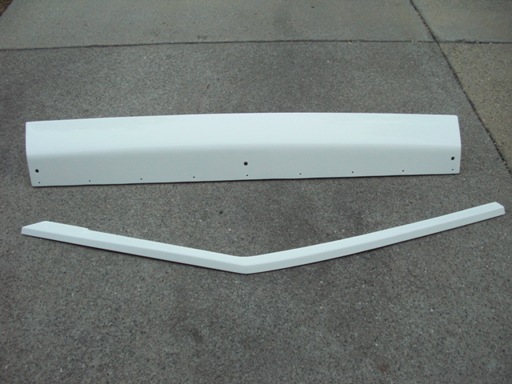
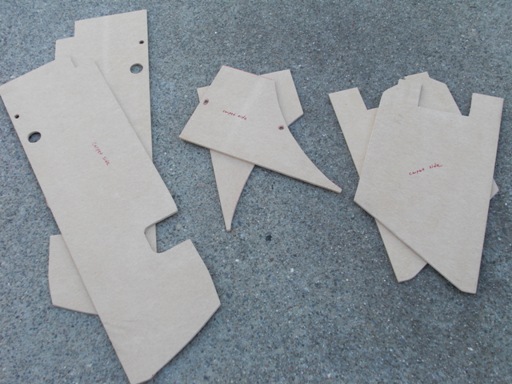
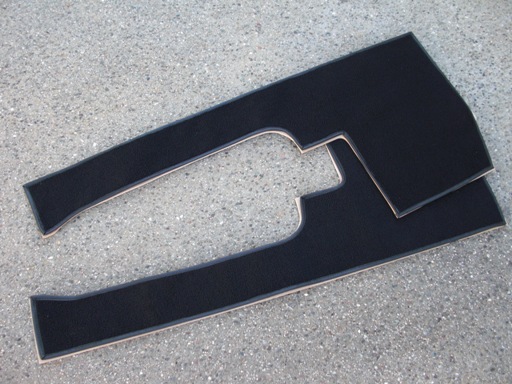
The remaining carpet board pieces cutout and ready for carpet.


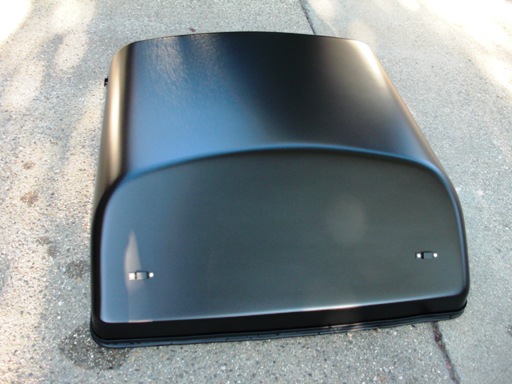
The side fuel tank boards after overlaying the new carpet sections.


Getting closer at this point. I just needed to paint the boards black
and glue everything down.


There were a lot of pieces and a lot of steps. This took forever!

S1 Lotus Esprit Rolling Chassis is Complete

After the body was sent out to be painted, I had a few weeks to complete the rolling chassis, spending time to ensure that everything was fastened correctly.

After a thorough “nut and bolt” of the car, I took dozens of photographs to remember what it all looks like. Once the body is back on the car, it's a shame that 90% of the chassis will never be visible again.


Thursday, August 11, 2011

S1 Esprit in Primer and Ready for Paint

To those who have undertaken projects like this, the “primer” stage of the car represents a big win as the hard work in the body prep process is done and you can finally get on with painting the car. In all it took four months to fix the stress cracks and spider webbing, fill the pinholes and smooth out the areas of the gelcoat that were originally flawed.

Every inch of the car was looked after - even the wheel wells and chassis tunnel were stripped of the old undercoating, prepared and cleaned prior to this stage of the process.

The primer sealer was sprayed in multiple coats and a final guide coat revealed that all of the panels (especially those with large flat surfaces like the front hood and doors), were perfectly straight. The car will be painted in two stage paint (Glasurit), in Monaco White, then wet sanded and polished. There are still many days ahead of work ahead but the end is near!


Sunday, May 22, 2011

Body Refinishing Hell

With the body prep process well under way, I have already logged many hours sanding, scraping, prying, and cleaning various areas of the body.

Overall this has been the most difficult, discouraging part of the restoration process. The body had many more stress cracks than I initially thought – most of them in really tough areas like the front and rear hatch drainage channels and the door sills. Essentially every area where something could be “slammed” closed (doors, rear hatch, front hood) had spider webbing everywhere and needed fiberglass repairs. Due to the contours of these areas, re-glassing and re-shaping took a long time. To fix the issue permanently, I added new layers of glass behind the visible surfaces to make them stronger.

Another issue is that the soda blasting was harsh enough to expose a lot of the underlying defects in the gelcoat. This revealed hundreds of small pinholes or imperfections that needed to be re-filled. Lesson learned that it was probably a bad idea to have the body media blasted.

Focusing on the underside of the car and the wheel wells, it had a fine layer of undercoat which I’m halfway through removing (I’d like to have the underside refinished), and the chassis tunnel had thick foam bonded to it, which I’ve have the pleasure of scraping off, usually straight into my face and eyes as I work upside down!

I opted to remove the rocker panels to make sure the underlying seat belt mounts weren’t rusted away (bad if I ever had an accident), but my panels were bonded which meant that I had to pry them away from the body. It wasn’t an easy job and I actually did more damage than good (my seatbelt mounts were perfect, no rust!!), so I ended up cracking the fiberglass in several areas of the rocker panels for no good reason. Both panels needed to be re-glassed in a few areas but that didn’t cost me too much time.

At this point of the update, my doors are fully prepped along with the rear hatch, front hood, rear valance, rocker panels, and headlight pods. I still have a lot of work to do on the main body but most of the hard repairs are done. Now it’s just a matter of doing more block sanding and filling pinholes. I’m getting there, but I can’t wait until this stage is done – I’m over it!


Friday, May 13, 2011

Rebuilding the Lotus Esprit S1 Radiator Assembly

The S1 Lotus Esprit has a prominent radiator shroud (a huge piece of molded fiberglass which bolts underneath the front of the car and holds the radiator in place). Since the outer face is visible from underneath the car, it was important to get everything back to factory spec. Mine was in bad shape and broken in several places. Since the radiator was not properly secured (all of the fixing bolts had worked themselves free over time), the heavy radiator was jumping around inside the shroud which broke the fiberglass in several areas. I re-glassed the bits together and then added a few more layers to ensure the new assembly was stout. The process took a long time, mostly because the fiberglass cloth had to be cut in the right pattern in order to create a uniform pattern on the backside of the shroud assembly.

From there, I sent out my radiator to get rebuilt and then welded a new metal radiator surround thanks to a kit supplied by SJ Sportscars. The old radiator fans (antiquated by today’s standards) were replaced with more reliable 7 x 2 inch fans. I needed to fabricate mounts for the fans to bolt directly to the radiator, but it was pretty easy to figure out.

As the last step, I refinished the exterior of the fiberglass shroud assembly, fixing some curb rash and rock damage on the lower edges, as well as smoothing out the seams and pinholes that were left over by a shoddy build process at the Lotus factory. After fitting a new metal grille, mounting hardware and a strip of sealing foam, I bolted the radiator back in place. Now it's ready to mount back to the car.


Working on the fiberglass radiator shroud after having
re-glassed the entire structure.


The shroud after the color was applied.


One of the aftermarket radiator fans.


The radiator fans attached to the radiator assembly.


A side view of the radiator shroud, which was re-inforced
with three full layers of new fiberglass.


A new radiator shroud grille, which I had powder coated
in wrinkle black.


Job done!