Monday, December 13, 2010

Restoring the Lotus Esprit S1 Heater Box Assembly

The Lotus Esprit heater box is a typical British unit. With the condition of the rest of my cooling system (completely corroded, blocked with deposits, etc.), I knew the heater core needed to come out and be inspected. The core itself was completely blocked, so I had it chemically cleaned and pressure tested.

The insulating foam on the outside of the box had deteriorated, as well as the weather strip inside the box where the vent doors open and close. After having the box assembly and vent doors powder coated, I replaced the foam and weather strip where necessary and re-assembled everything.

It’s a job worth doing when the car is apart given that it’s impossible to access the heater box with dash and steering column installed.


The front of the heater box mounts to the fan assembly. All the sealing and insulation foam had to be replaced.


Since the heater core needed to come out, everything was disassembled.


The heater core restored and re-foamed.


The heater box skeleton powder coated and ready for the internals.


One of the heater vent flaps finished with new weather stripping.


The completed heater box unit. Job done!

Rebuilding the S1 Lotus Esprit U-Joints

The first step in rebuilding the S1 Lotus Esprit u-joints is to remove the entire unit from the car (half shaft with stub axle). It would be nice if this process were easy, but given that the half shafts are heavily stressed, the stub axle usually ends up welded inside the rear wheel bearing, meaning you can’t just slide them out.

After hours of time with a hammer, I realized that the only way to withdraw the stub axle would be to use a press. About 1.5 tons later, they came out of the wheel bearing and now I could start the rebuild process. Removing the old u-joints is easy albeit a messy job. It’s a good idea to keep a few of the old u-joint grease seals if they are in good shape as I ruined a few of the new ones when pressing the bearing back in.

After everything was apart, I opted to have my half shafts powder coated and the stub axle and gearbox connecter zinc plated. Installing the new u-joints took me a full-day and it’s not something I look forward to doing again (although I know I’ll have to after about 20K miles!). The bearings don’t press in easily, it’s hard to make sure none of the rolling pins become un-seated, and it’s easy to destroy the new grease seals. When putting everything back together, you have to be extremely patient.

This was an exciting step in the restoration process because it means I can now mount the rear uprights and suspension and get the Esprit back on four wheels.


The powder coated halfshafts, ready for new u-joints.


the freshly plated stub axles in yellow zinc chromate.


The halfshaft gearbox mountings also received yellow zinc chromate.


Four new sets of ujoints, ready to install.


The completed stub axle assembly.


The completed gearbox mounting assembly.


Jobe done!

Restoring the Lotus Esprit S1 Rear Hub Carriers, Replacing the Rear Wheel Bearings

Replacing the rear wheel bearings on an S1 Esprit is easy as long as you have a press. I removed the entire hub carrier assemblies from the car (including stub axle, half shaft and u-joints) and took them to a shop to have the stub axles pressed out of the bearings (no, they won’t come out any other way). After the stub axles were out, I had the bearings pressed out too.

I had the hub carriers walnut blasted to restore their original appearance, and ordered a set of bearings and new grease seals.

Since the bearings didn’t slide back into the hub carriers, I froze them overnight and heated the carriers to 300F in my kitchen oven and then the bearings simply fell in without effort. After replacing the c-clip to anchor them in, the job was done!


The empty rear hub carriers after being media blasted. They will never look this clean again!


The frozen wheel bearings ready to drop in.


New seals and c-clips, ready to install.


Job done!

Friday, October 22, 2010

Taking a Break to See the 2013 Esprit - Paris Motor Show

When I learned that the new Lotus Esprit would be unveiled at the Paris Motor Show in October, I was lucky to schedule a work trip around it and get myself to Europe. In all I was incredibly impressed with everything Lotus brought, but my clear favorite was the Esprit. For some of the criticism the car has received (too heavy for a Lotus, too much overblown horsepower, it looks like other Italian super cars, etc.), I think they nailed the design. I love it, and I also love the Elan, which will be priced considerably lower than the Esprit.

It remains to see if they'll actually produce all the concepts, but it was fantastic to see Lotus with such a strong presense and glimps into their future.


I was waiting for this for a very long time. At last the new Esprit is coming.


The basic wedge shape lives on. Too bad they didn't retain the classic
"Esprit" font from the late seventies but the brand has to move on!


The new Esprit had carbon everywhere - in the trunk lid, rear panel, rockers, interior bits, and even the wheels. The basic wedge shape is still retained but utilizing Lotus' new front end styling.


The Elan is extremely sharp, and in reality isn't too far differentiated from the Esprit.


The exhibit was fantastic. They had actual crash helmets from ex Lotus works drivers like Ayrton Senna, Jochen Rindt, Nigel Mansell, Elio de Angeles, and many others. Actual track notes from Colin Chapman and ex- race engineers were on exhibit as well, and video on a theater size screen displayed footage of fallen greats like Denny Hulme and Jim Clark. Lotus definitely stepped it up in Paris.

Wednesday, October 6, 2010

S1 Lotus Esprit Gearbox, Refurbished and Ready to Go!

The gearbox is one of the components I didn’t have a hand at rebuilding. I take my hat off to those who have done it before. You’re brave. It’s a complicated job.

It has been rumored that the old Citroen box is good for life in the S1 Esprit given its conservative power output. I was tempted to give the gearbox a good scrub and simply bolt it back up, but given how far I’m into this project I decided to do it right and send it out. Thankfully, the gearbox was perfectly solid with the exception of a few major oil leaks which were fixed with new gaskets and some Well Seal.

While the gearbox was out for service, I had the flywheel resurfaced and ordered a new clutch. I also ordered a new slave cylinder and zinc plated the remaining odd parts (clutch fork, clutch adjusting screw, and return spring). I also purchased all new hardware for the bell housing.

After the gearbox was returned in good health, I mounted the rebuilt brake calipers, resurfaced rotors, and mounted the lower suspension arm beam.


What the gearbox looked like after removing it from the car. Many
hours of cleaning ahead.


The new clutch, ready to go in.


The pressure plate was ok, so there was no need to buy a new one.


The resurfaced flywheel ready to bolt onto the crankshaft.


The completed gearbox assembly. Job done!

Rebuilding the S1 Lotus Esprit Clutch Master Cylinder

Don't rebuild it. Buy a new one. The clutch master cylinder on early Esprits happens to be common across a variety of cars (Land Rover 90 is the one I referenced) and is readily available for next to nothing. Instead of taking a chance with mine and having it leak later on, I ordered a new one. I discarded the external plunger arm and used the same one that I removed from my car. Otherwise, the length isn't the same and it will cause problems when it's time to mount to the pedal box.

Rebuilding the S1 Lotus Esprit Slave Cylinder

The slave cylinder from my Esprit was too far gone for a simple rebuild (re-sleeving was necessary), so I decided to do some research and try to find a new one. It turns out the slave cylinder on the S1 Lotus Esprit is virtually the same as a Nash Metropolitan and Austin A55. Many Formula Ford racing cars use the same cylinder as well. I found one cheap on eBay and I figured it was worth the money to simply buy a new one. The mounting holes (where the two bolts secure the slave cylinder to the gearbox) are too small and require some filing. It's an easy job though (5 minutes max), and then the bolts can slide through.

The fitting came as part of a SJ Sportscars kit that also included a braided stainless steel hose. It's a worthwhile upgrade to eliminate the old red hose, which swelled in the heat and caused the clutch engagement to be inconsistent.

Sunday, June 20, 2010

Refurbishing the S1 Lotus Esprit Rear Links

I opted to burn the old rubber bushings out of all the suspension links (my neighbors really appreciated that one), and then all of the suspension pieces were powder coated. I didn’t realize that you need to remove a thin metal sleeve from each end of the links before you can install the new poly bushings so I used a hack saw to cut through them so they could be pressed out. Without using a saw, they were impossible to press out using my shop vice so this was the only way outside of using a 12 ton shop press. After the metal sleeves were out, the poly bushings only took a few seconds to squeeze in. Overall a pretty easy job!


Buring out the old bushings, which takes about 5 minutes per side. Lots of smoke.


The rear links after being powder coatedm minus the bushings.


The rear links with the new poly bushings, done and ready to install.

Restoring the S1 Lotus Esprit Wofrace Wheels

The wheels on my S1 Lotus Esprit were painted at the factory to match the color of the car, so after stripping the paint from the wheels, the aluminum material underneath was in excellent shape. I took an orbital brass wire brush to the back of the wheels to remove the old brake dust, and cleaned the recesses where the center caps snap in.

I had the choice of either polishing the wheels or having them turned on a lathe (lathe is how they were produced originally). I opted to polish the wheels, but after many failed attempts trying to do it myself I decided to leave it to a professional.

After the wheels came back, I primed and painted the inside of the spokes flat black. The difference is significant in making the aluminum finish on the wheel faces stand out more.

I purchased a set of aftermarket Wolfrace center caps as my originals were all destroyed. I picked up the best set of tires available in the United States (highest quality and speed rating), which happened to have a remotely similar tread pattern as the originals. My wheel nuts were in bad shape so I purchased a new set, as well as the aluminum insert washers. The last step was to attach the center cap stickers.

In all I expected to spend only a few hundred dollars restoring the wheels and ended up spending several multiples of that. It was one of the unexpected big costs of the restoration, but necessary as the Wolfrace wheels are such a vibrant element of the S1 Lotus Esprit.


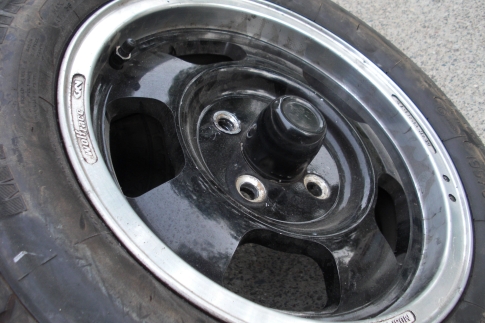
What the Wolfrace wheels looked like after removing them from the car.


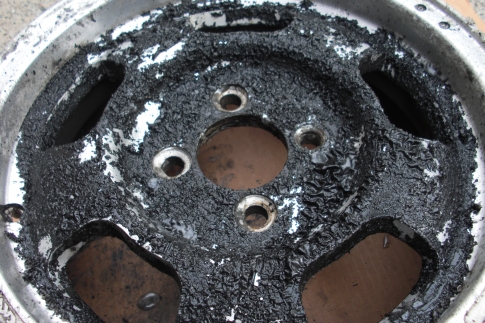
Removing the old paint to reveal a dull aluminum finish underneath.


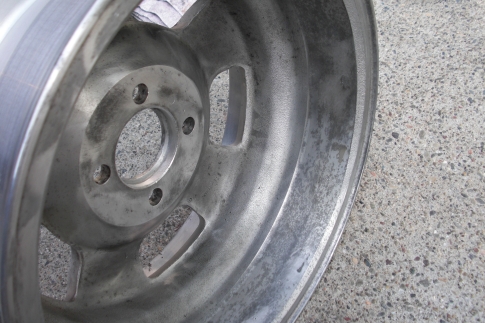
The back of the wheels received a good clean to make sure no dirt or brake
dust interfered with the polishing process.


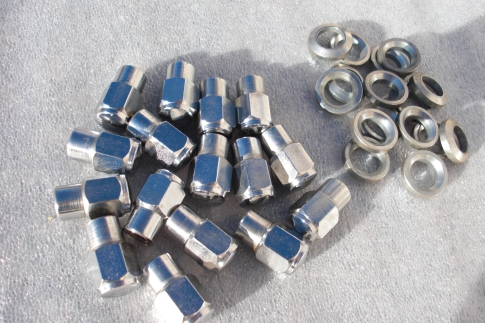
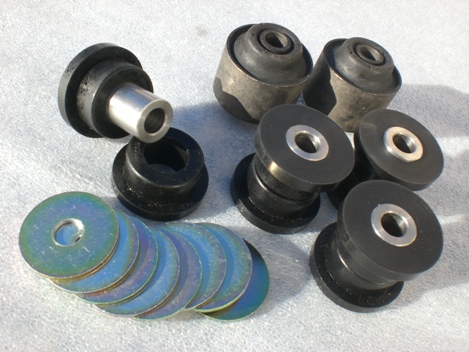
I purchased new wheel nuts and seating washers.


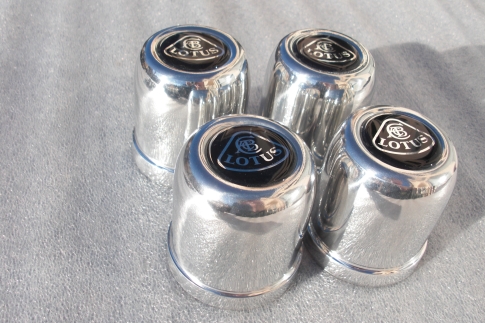
The aftermarket Wolfrace wheel center caps and Lotus decals.


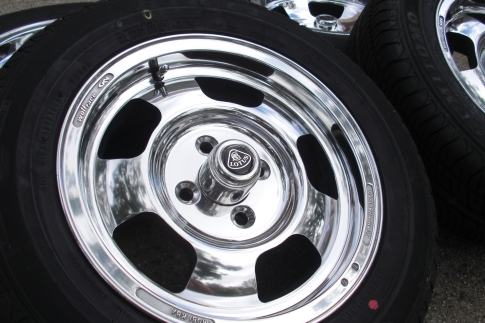
What the wheels looked like after being polished.


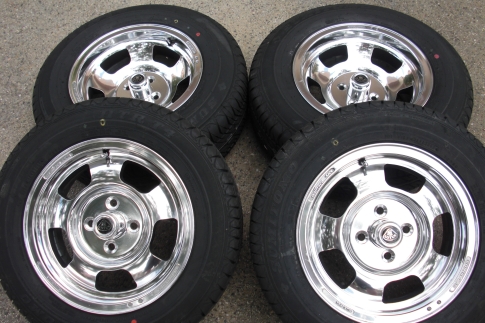
Tyres mounted and balanced and ready to go. Job done!

Sunday, May 16, 2010

Resurfacing the S1 Lotus Esprit Rear Brake Rotors

My rear brake rotors were close to the maximum thickness, so they had virtually zero wear other than rust and other deposits that had accumulated over time. Instead of replacing them and since the rear brake rotors for the S1 Esprit are unique (that also means expensive!!), I decided to have them resurfaced. The job was relatively cheap ($40 USD) and there were many local shops capable of doing it. I blasted the surface rust off the center of the rotors and then repainted them, and the ring plate which goes between the brake rotor and the gearbox mounting plate was yellow zinc plated.


Friday, May 14, 2010

Re-fabricating the S1 Lotus Esprit Aluminum Cooling Pipes

Two aluminum cooling pipes run through the chassis to feed water from the radiator (located in the front of the car) to the engine, which are aided by two external elbow pipes. The pipes through the chassis are pretty long (5-6 feet) and have a 90 degree bend on the side mating to the radiator. The pipes on my car were corroded and needed to be replaced, so I simply had a local shop re-fabricate them. It wasn’t cheap but it was more cost effective than having the pipes shipped from England. Since it’s impossible to find the rubber grommets which secure the pipes through the chassis, I had to special order them as well.


All of my cooling pipes looked like this. Obviously time to replace!


One of the new cooling pipes ready to go back into the car and through the chassis.


One of the new fabricated elbow pipes ready to install.


New rubber grommets help secure the pipes through the chassis.

Preparing the Lotus Esprit S1 Engine Mounts

The engine mounts on a S1 Lotus Esprit are the same as a Bedford van. I picked them up on eBay UK for relatively cheap, but the downside is that they don’t have the locating tabs which lock the motor mounts in place. The solution was to purchase four set screws that have roughly the same diameter face as the locating tabs (I made sure they weren’t soft metal wood screws). Then I marked where the tabs should be on the new motor mounts, drilled the holes, tapped the holes so the set screws could go in, and then anchored in the set screws. The only thing I had to be careful of was drilling too large a hole (then the set screw wouldn’t be able to go in tight), or drill too far into the rubber. Otherwise, it’s a pretty easy job.


I marked the spot where the screw should go in on the new motor mount.


Then I drilled, tapped, and anchored the screw into the motor mount.


The new motor mount attached to the powder coated chassis bracket, ready to go!

Wednesday, May 12, 2010

Restoring the S1 Lotus Esprit Gearbox and Suspension Mounts

Two aluminum mounts help connect the gearbox to the chassis, as well as the vertical uprights which attach to the lower suspension links. Restoring them is easy as long as you have access to a 12 ton shop press to remove the old bushings. The mounts take on a lot of stress so it's not surprising that the bushings were literally welded in place. Once those were removed, the inside of the bores needed to be taken down with fine emery to eliminate some of the heavy scratches. After that, the new bushings went in without problems, although a press is still required to get the center metal bushing anchored.


The gearbox mount after removing the old bushings. Some of the
deep scratches are obvious and need to be cleaned up.


The old bushings after being removed. The smaller bushings aren't
available anymore so they need to be replaced with polyurethane.


The new bushings ready to install.


The bushings pressed in and ready to mount!