Tuesday, February 19, 2013

Replacing the Wiper Switch, Indicator Stalk

Finding a replacement for the indicator stalk on my Esprit was not possible, so I found an aftermarket switch used on a similar year car, which ended up being a Land Rover Series 3. The switch is identical to the original except that the connector pins are different, meaning you can’t connect it to the existing Esprit wire harness. More importantly, the actual stalk (or turn indicator arm) is bent the wrong way so it’s right up against the steering wheel. Both are pretty easy to fix. I ordered a set of Delphi GM 6 pin connectors and then re-wired the wire harness and the turn indicator to accept the same connector. Then, using a vice, I simply bent the stalk arm in the direction away from the steering wheel (carefully though as it seems like you can probably snap it in half if you go too far).

I picked up a new wiper arm switch, which is identical to a Triumph 2000, and then re-wired it using the same Delphi connectors I used for the turn indicator stalk.


Monday, February 18, 2013

S1 Lotus Esprit Dashboard Restoration, Interior Progress

With the interior completely re-trimmed, I’m starting to put all the pieces back into the car. So far the hardest job was changing the structure of the dashboard to mirror the look of the European cars. As far as I can tell, the difference in a US car is a bulgy piece of trim that runs parallel to the length of the dashboard which limits the size of the glove box lid. I always liked the look of the European dashboards better, without the trim piece, and with the larger glove box lid. So I fabricated the fiberglass to be able to accept the larger glove lid and ordered the Euro spec part from SJ Sportscars, mocking it all up prior to being reupholstered. Luckily everything fit nicely after coming back from the trimmer and I could get the dash back into the car.

All of the other pieces fit well so now the remaining job is to route the aluminum trim that surrounds the center of the dash and down the center console.


Installing the Rear Hatch Glass, Windshield on my S1 Lotus Esprit

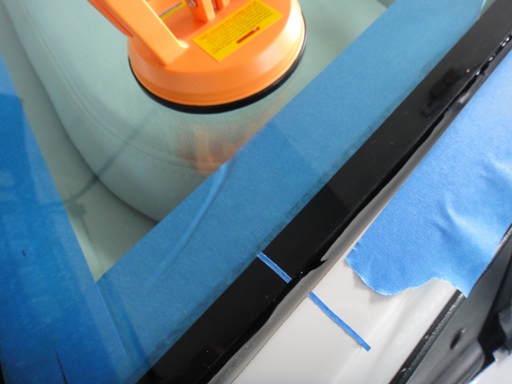
This was a hard job. If I could do it over again, I would probably just keep each section of glass bonded into the car and removed the trim pieces prior to sanding and painting the exterior. The biggest issue with replacing the glass is finding suitable spacers that go between the fiberglass frame recess and the glass itself. If the spacer is too low then the glass sits too low and the aluminum trim pieces don’t fit flush with the body. If the spacers are too high then you have the opposite problem. I ended up buying 7 mil thick ‘hard rubber’ matt on eBay an then cutting the spacers from that, which worked perfectly for both the windshield and rear hatch glass. The next step was to mask a roughly 1 inch border on the underside of the glass where I then applied the window sealing primer. I had to brush two coats of primer to completely eliminate the transparency of the glass.

I had never bonded in a windshield so it was all new territory for me. It’s definitely an art. Once you start to apply the bead of sealant onto the window frame you quickly realize that you’re only going to have one go at it. And once the glass is put into the recess and on top of the sealant, it’s possible to move it once, maybe a few millimeters, but then that’s it. I imagine the factory probably had a special jig for this to get the fitment perfect, but none of that was available to me. So with the help of my wife and a little luck, we put the glass into place and as straight as possible. After a few days I drenched the window glass with water to find leaks, which there were many, and then filled them in using a ‘body filler’ squeegee. I just applied more of the sealant in the areas where there were leaks and then kept re-testing with water. It took a long time and you need to eliminate all the leaks prior to snapping in the aluminum trim pieces (where afterwards you can’t remove them without ruining). It was a lot of steps for what looked like a straightforward job!


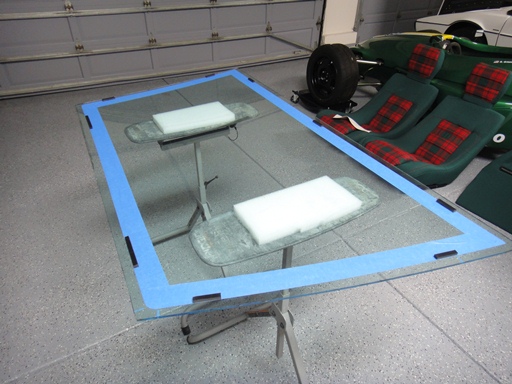
Windshield masked and ready for the primer.


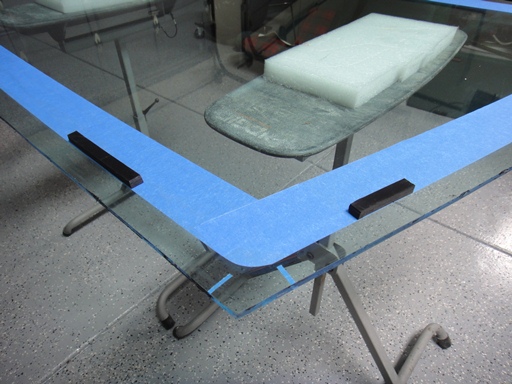
The spacers go at the very edge of the glass, not where you see them here.


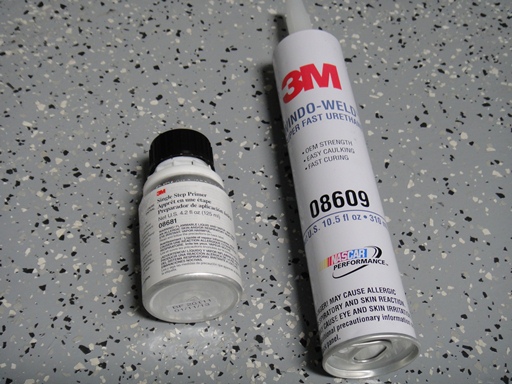
I used 3M single stage primer and fast curing urethane adhesive.


The windshield bonded in and the marks all lined up.


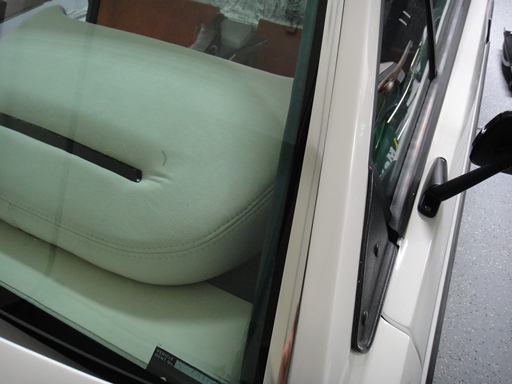
Windshield sealed, trimmed and ready to go!

Re-Trimming the Center Console & Window Switch Gear

The plastic window switch plate that fits into the center console of my car was warped beyond repair so I purchased a new one from SJ and then cut all the openings for the new window switches and the new choke warning switch. I stripped and re-painted the choke pull lever and mocked it all up in the car to make sure everything fit. Then the switch gear was sent to the re-trimmer to get covered and the gear shift gaiter fitted.

I ended up modifying the center console to delete the radio as I didn’t want one in my car, so that section was covered by the re-trimmer and then we attached the chrome trip pieces that wrap around the center console and onto the dash. Overall an insane amount of work for just a few interior pieces!


Replacing the S1 Lotus Esprit Oil Pressure Sender

I accidentally threw away the oil pressure sender when I removed the engine. Wish I hadn’t done that as finding a genuine replacement would turn out to be impossible. Rumor had it that the oil pressure sender on the S1 Lotus Esprit was out of a Fiat X19 (same because both cars used Veglia gauges), so I picked one up on eBay. It wasn’t the same, so in order to mate the stainless steel oil pipe to the sender, I needed to organize a Frankenstein array of fitting adapters to connect that pipe to the actual sending unit. The adapters needed were a M14 1.5 Female to 6AN Male to a 6AN to 6AN Female Union to a 6AN Male to 1/8 BSP Male. With that everything fit, although I’m still yet to figure out if the sender will even work!

Upgrading the S1 Lotus Esprit Fan Switch

The original S1 Esprit had a fan switch embedded into a long aluminum cooling pipe that runs from the top of the engine to the ‘chassis tunnel’ cooling pipes. By the look of my car and all the water damage around the pipe when I removed it, these switches were prone to leaking. So I cut that section out of a new aluminum pipe and replaced the fan switch with what should be a more reliable solution. I used a 32mm water temperature sender adapter and an aftermarket fan switch to fit the 1/8 npt recess.